

Tech: traditional Japanese wood burning for your terrace
About Shou Sugi Ban, a traditional Japanese technique for preserving wood, also called charring for permanent and very stylish maintenance of your terrace, wood paneling, railings and much more.
Here comes a HOW-TO article from one of my private projects. Apart from a hint of HSE, it has absolutely nothing to do with work in general. When you have property, the topic of MAINTENANCE will undoubtedly appear quite quickly. In Norway, a lot of wood is built, so maintenance is an extra important issue.
After changing too many terraces and seeing how impregnated wood rots away, no matter how well you take care of it, I was ready for a completely different approach. It required some experimentation but the result was so good that I will report on it here. Feel free to share and try for yourself at the next renovation or construction project, you will be pleasantly surprised!
Shou Sugi Ban (Yakisugi) is a traditional method that has been used in Japan for many centuries. For anyone who is not fluent in Japanese, the word is a combination of the terms "fire" and "cypress".
It gives a very special effect and looks (and is!) Top notch, high class!
In the absence of access to cypresses in this country, I went a slightly different path in the choice of materials, and chose wood that has been tested, among other things. in Canada. And then it must work in Norway too? A little with a heart in my throat, I ordered planed spruce wood in the dimensions 28 x 95mm. I was able to plan them like this from a sawmill, that way it fit well with a 5mm distance between the planks. The owner of the sawmill was interested in what kind of plans I had, I mentioned that I did NOT want impregnated tables, and that these should be used as a terrace. They were to be made durable by burning according to an old Japanese recipe. The answer came in contact: "Yes, the Japanese have probably always been innovative and invented a lot of smart". OK, so I was not led by a professional in wood, so it was a good starting point.
And it really did. You must be aware that the initial work is NOT less than with ordinary treatment (painting eventually) of impregnated terrace table, but the work in the long run - this boring, recurring board with maintenance - falls away. With my rational approach to work, I timed how quickly I managed to process a plank, and came to approx. 15 'per 3 pieces (I made 3 and 3 at a time). This was the absolute best time I could hold for a few hours and required efficient work. Bonus was that attendance at the gym was not necessary that day, you get enough exercise to say the least. If there are more people, it naturally goes faster because you can share the tasks.
Necessary tools:
This is a purely private recommendation, there are probably other, suitable tools as well!
- Gas burner. Most affordable and easy of the type used to burn weeds. Buy a large propane gas bottle.
- Gas burner with point flame. Such as used to process metal, which all farms have, in industry, for school experiments (chemistry classes), burning of weeds ...
- A brush or scrubbing cloth (which does not scratch the wood)
- Cold pressed linseed oil and a brush
So here's a step-by-step recipe for charring and preserving wood - Shou Sugi Ban.
Use the gas burner to char the surface. Do not pay too much attention to twigs and bumps, otherwise you will easily burn too much. Then you have more cleaning work later. You are "done" when the surface is clearly charred and not just changed color. You can burn several planks at once to be economical with gas and rational with your time. Remember then that there are temperature differences (among other things due to heat reflection) which means that variations in the burning can occur. You will find out about it.
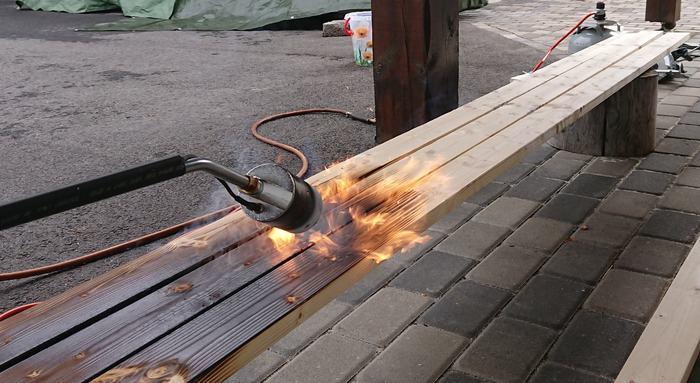
Then the narrow sides.
Do not forget the ends. It is best to measure finished for a long time first. This requires a little more time, but is definitely worth the work, instead of starting to burn later, when the planks are to be put in place.
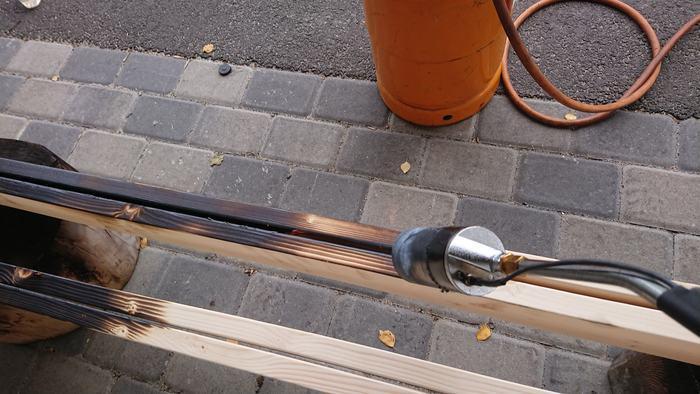
After burning 3 sides, the back looks like this. So it will be a little less work to burn this page.

You see that the twigs have a lighter color and are not charred yet.
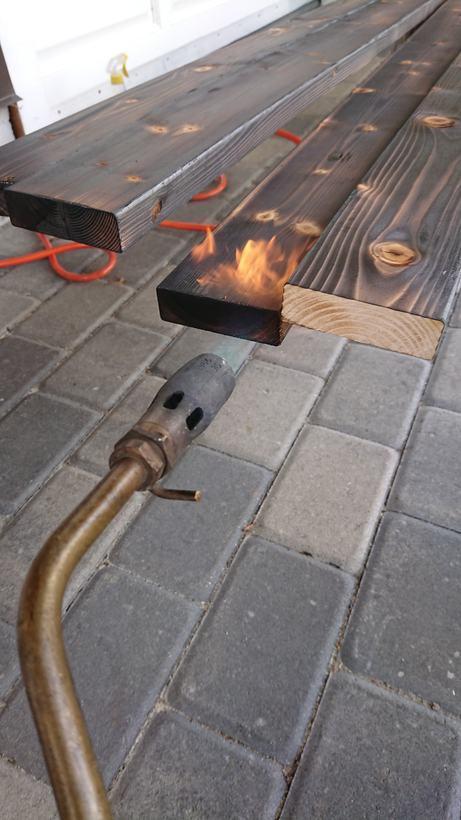
To achieve this, we use a point flame and burn all the twigs individually.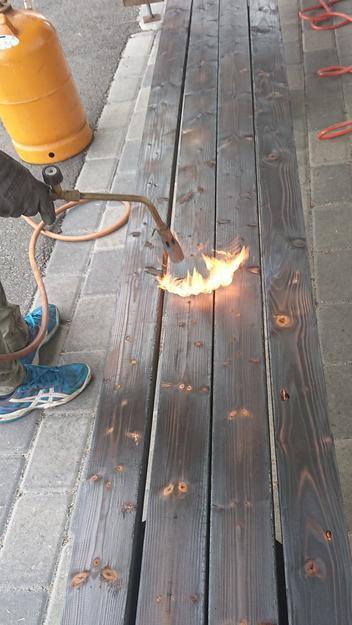
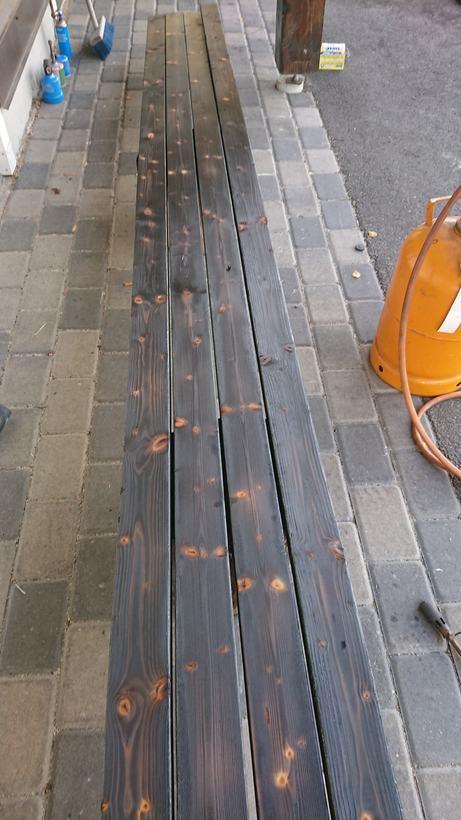
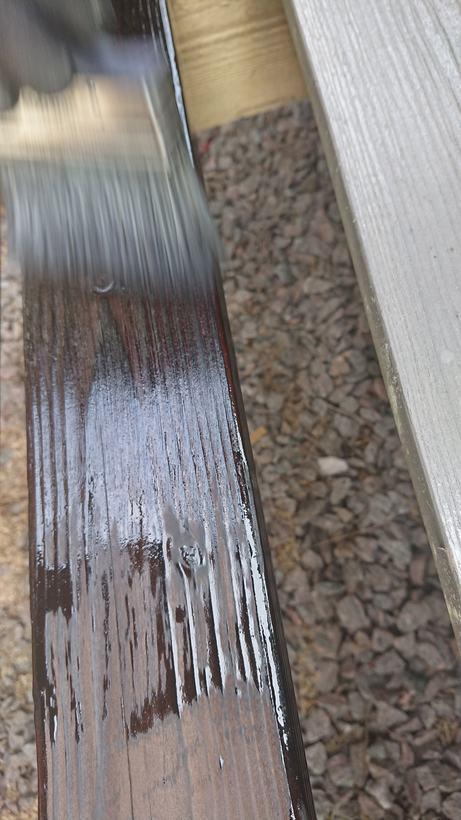
And this is what the burnt plank looks like. Homogeneous color.
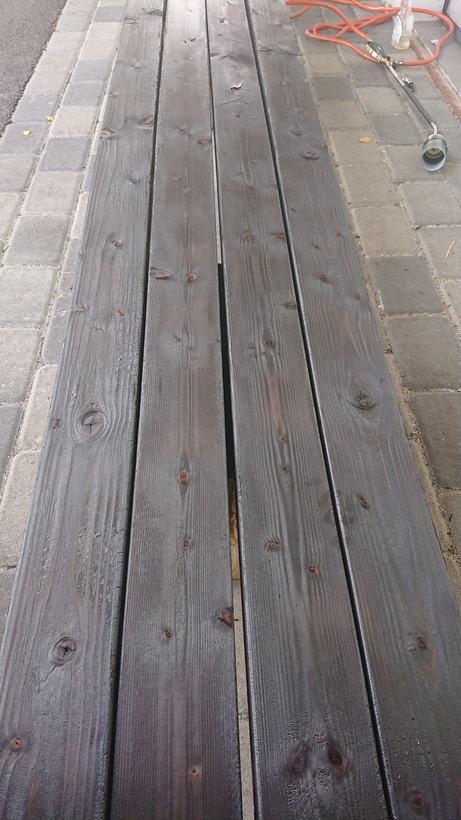
Now comes the cleaning job. All soot and charcoal are removed manually with a scrubbing cloth or soft brush. Copper brush is often recommended, but experience has shown that cloth works just as well if not better.
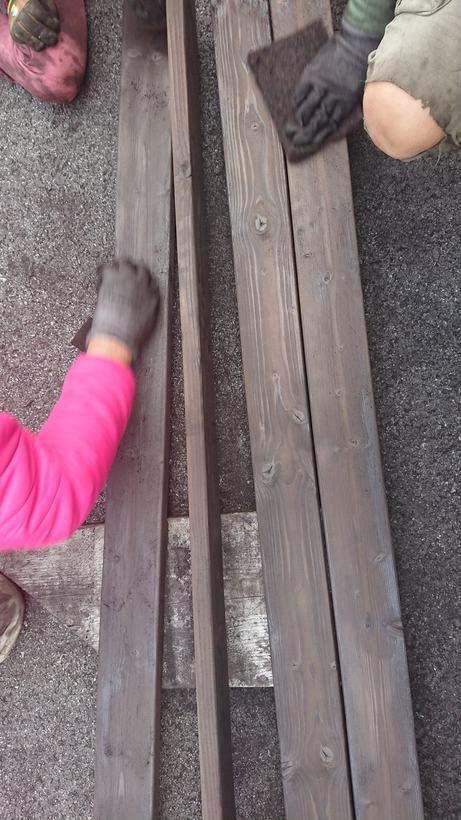
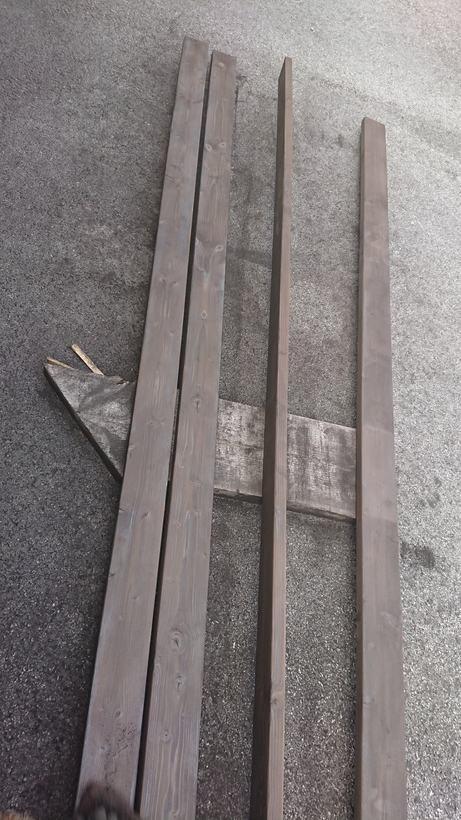
The planks have now been given a nice, smooth surface. Structures are clearly visible and all soot has been removed. Use either a broom or compressed air.
We now use linseed oil to seal the surface. I used cold pressed boiled linseed oil because it was readily available. This is used today for traditional restoration of buildings, treatment of wooden boats, and in its pure form it can even be put in salad as a health food.
In contrast to modern colors and surface treatments, linseed oil has the property that it penetrates well into wood and saturates it. The membrane that forms on the surface is open to diffusion, ie moisture in wood can escape.
A layer of linseed oil is applied, preferably more if you wish. Wipe off what remains on the surface. This gives the planks a very dark, black tone. They will be brighter for a few weeks when exposed to sunlight. If you want the dark tone back, then just go over with a new layer of linseed oil.
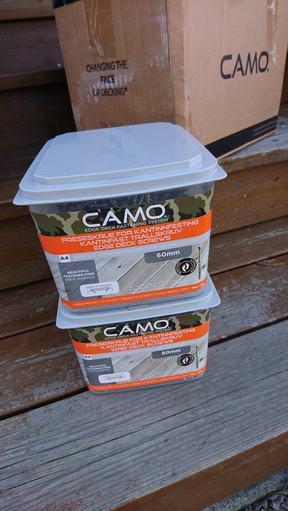
If you like to walk on the terrace with bare feet and do not want to ruin the beautiful surface with screws, chips that protrude and damage later due to water that penetrates into the planks, then there is CAMO.
This is a hidden screw solution where the screws are attached at an angle from the side. The surface is thus whole and clean.
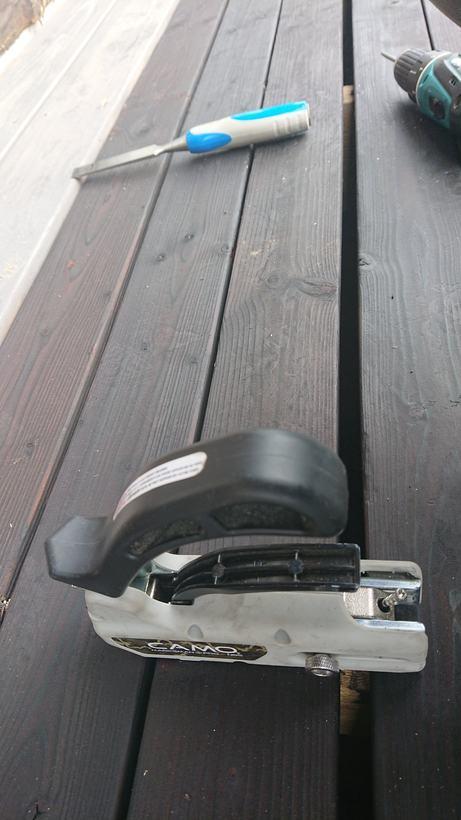
Camo-tool in action. The planks are fastened hidden on ordinary substructure. The tool ensures the correct distance.
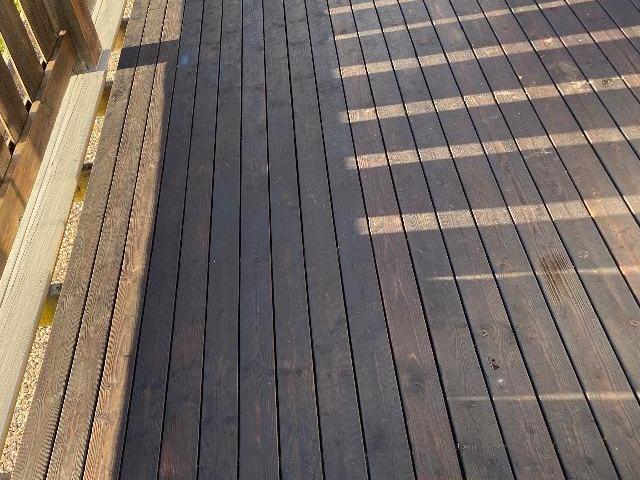
And this is what the finished product looks like. Set in both light and shadow ...
As always: The article is to be considered a personal opinion with no guarantee of completeness or correctness. I will always make sure to use the best possible sources. The use of the recommendations is the responsibility of the reader. Read the disclaimer here and use common sense. Thanks.
I hope you have got a good impression. If you are a little handy and dare to make some mistakes, you will get a stylish and very durable solution for your terrace that will increase the value of your patio.
Good luck!
Back
All comments are moderated before being published. Your email will not be visible